Vital Statistics
| Strength | 4 |
| Agility | 8 |
| Intelligence | 6 |
| Cuteness | 10 |
With great fragility comes [the need for] great dexterity.
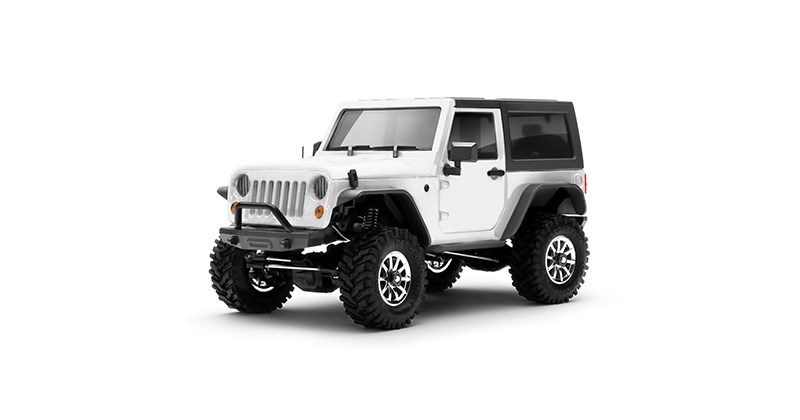
There’s no doubting that the Orlandoo Hunter OH35A01 kit wins out in the cuteness department, but it’s a bit of a struggle to get together for someone with fat fingers, failing eyesight and a heavy hand. Someone like me it turns out.
At 1/35 scale the kit components are, understandably, small, easy to lose and easy to damage in spite of the warnings scattered through the assembly instructions.
But first, let’s talk about tools. From the outset I found that the hand tools I already owned were just barely sufficient to begin construction (the screwdriver included in the kit is most definitely not), but really the best thing I did was to recognise when things weren’t going quite as well as planned, and put it all back in its box until I could find something to help.
That something turned out to be a Wowstick electric screwdriver. This was a game changer, not only for this kit but for pretty much all other RC construction tasks I think, or at least up to 1/10 scale.
Anyway, armed with that I returned to the build to finish it up but by then some damage had been done, and there are some points to be particularly careful of where a cool new tool won’t help.
Let’s dive in…
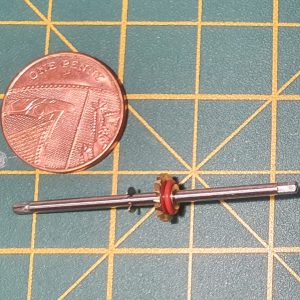
Construction starts with the front diff and axle. It took me a solid 20 minutes just to coax the tiny circlip on to the axle shaft. This was a lesson in balancing dexterity and enthusiasm as enthusiasm was definitely winning.
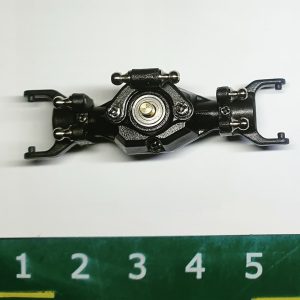
The diff assembly and core axle took about an hour and a half, much of which was spent trying to persuade the ball joints into their respective screw holes.
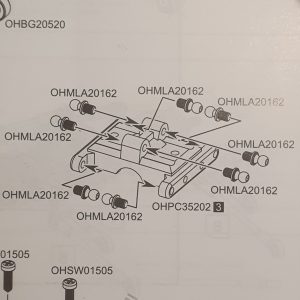
This is where some of the earliest casualties fell. Securing those inner ball ends was tricky and I managed to split the plastic around one, due in part to the awkward angle of approach and also my general cack-handedness. A few screw heads also got a bit mangled. But I pressed on regardless, because optimism.
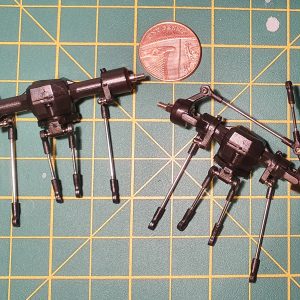
The instructions for assembling the axles are pretty good and the component outlines in the left margin were frequently checked to make sure I was using the correct parts and hardware. There are several “Do not twist the screw too tight!” messages sprinkled around the instructions – and knowing what too tight means comes with experience I guess. I definitely over-tightened things here and there. This was the point at which I decided to park the project, gather my thoughts and reflect on my abilities!
Actually I went off to build a more manageable WPL C24-KM kit for a while because I had to know if I still could!
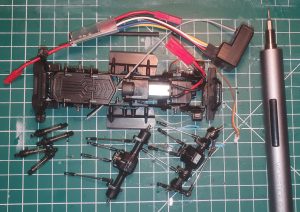
The arrival of the Wowstick (included in the picture above) reignited my fire for the little Orlandoo, and I was back into the build in no time.
Construction of the chassis hit another wall when I was confronted with the electronics, and specifically the LEDs. There were no real clues about how these should be wired up (beyond where they need to be soldered to the controller board) so I figured I’d put them in place according to the instructions and do the actual soldering when I had a better picture of how and where the wires would run.
While we’re on the subject of LEDs let’s take a minute to consider the SMD LEDs that are included with the lighting kit. They are tiny and I was puzzled by how and where to solder them. To be honest I don’t think I’ll be using them because that really is stretching my patience and dexterity too far. So for now they are (after altogether too much wrangling) located in their respective holes and held in with Blu-Tack(!). I reckon I’ll swap them out for larger rectangular LEDs which I can actually manage, and probably adapt the chassis accordingly.
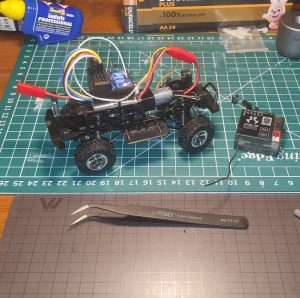
While assembling the rest of the chassis those earlier casualties I mentioned became apparent when trying to connect the link rods as the ball ends just weren’t properly secured and kept breaking out, so for now I’ve resorted to using a dab of glue to hold them in. We’ll see how well that holds up.
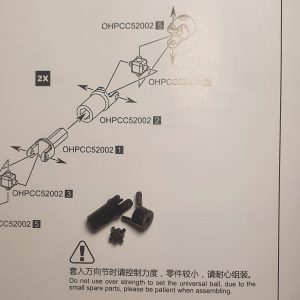
The drive shaft assembly is also particularly fragile, and, again in spite of the warnings, I managed to break just enough parts to render it impossible to complete both shafts. I think I’ll swap the plastic parts out for metal replacements which I think are available (I still have to double-check the specs). But for now this will be a rear-wheel drive only Jeep.
When I started this I figured I’d use my Flysky FSGT5 radio because the little FS-BS6 receiver module is so small, and relatively cheap, and has all the channels I could want for running the lights etc. Only it’s nowhere near small enough to be accommodated in this 1/35 build, so I’ll have to look at how much volume can be saved by de-casing it and removing the pins and plugs in favour of hard-wired connections. We’ll see.
The bundle I bought included the motor, controller board, a battery and those LEDs, but I really didn’t want yet another radio/receiver so didn’t go for the one that’s designed for this kit. I’ll let you know if I manage to get the FS-BS6 installed.
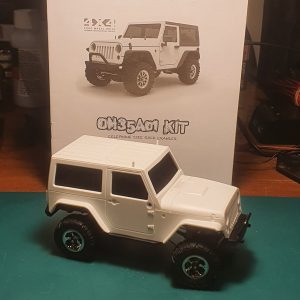
So here we are. The mechanical build is pretty much done, but I may revisit those damaged parts with upgraded replacements. I haven’t glued all the trimmings to the body yet because I still have to paint it and decide what to do with the lights.
The photo above also skillfully (I think) hides the RX hanging out from under the wheel arch on the far side. But it drives forwards and backwards and steers left and right. I just don’t think it’ll do much off-roading yet, due to being 2WD only for the time being.
Overall thoughts
It’s a challenging build if you’re not used to working with such small components, but with patience and a steady hand it comes together in the end and just look at it, even in its unfinished state it’s a very pleasing little model.
Hopefully I’ll get that RX sorted soon and can get into the weeds – possibly literally – of driving it.
Would I buy another? No, not in kit form but very probably in an RTR format if that were available.
Usually after a build is complete (or an RTR is unboxed and examined) I look forward to exploring upgrade possibilities. I’m not sure if I will go ahead with significant upgrades here. The axles and drive shafts are relatively easy to get to and swap out so those will likely be tackled, but let’s see what else (if anything) becomes available. Time is a great healer after all.